On the night of 5/6 October 1941, the ship that would become one of the world’s most famous and best-loved wreck dives was sunk during a surprise attack as she lay at anchor not far from the Sinai Peninsula.
The SS Thistlegorm has held a special place for me since I first dived on her in 2004, but when I returned to Sharm El Sheikh as an instructor five years later, she became the absolute love of my diving life.
When I first started guiding there, my briefings were a fairly standard: ‘We’re going here, looking at some stuff, dive time will be this, signals will be that, don’t forget your torch, no deco’, with a little bit of history. But in 2010, I was working the boat with a good friend, super-experienced dive guide and tech instructor Dave ‘The Cave’ Summerfield, and so enthralled was I with his ‘Time Machine’ briefing that I decided to – er – ‘borrow’ it and make it my own.
- Related: Everything you need to know about diving on the Thistlegorm
- Related: The Black and White past – a Photographic Tribute to the SS Thistlegorm
- Related: A Rare Opportunity to Dive the SS Thistlegorm Undisturbed
- Related: The Thistlegorm Project – Bringing the Sunken Secrets of WWII to the Surface
It was his briefing that inspired me to turn Thistlegorm trips into historical underwater experiences, rather than just dives on a sunken ship. I should also note that if there is any similarity to source material I might have referenced six years ago – or any historical inaccuracies – then I apologise, but what follows is – pretty much verbatim – the dive briefing that I used to give during excursions to the wreck of the SS Thistlegorm.
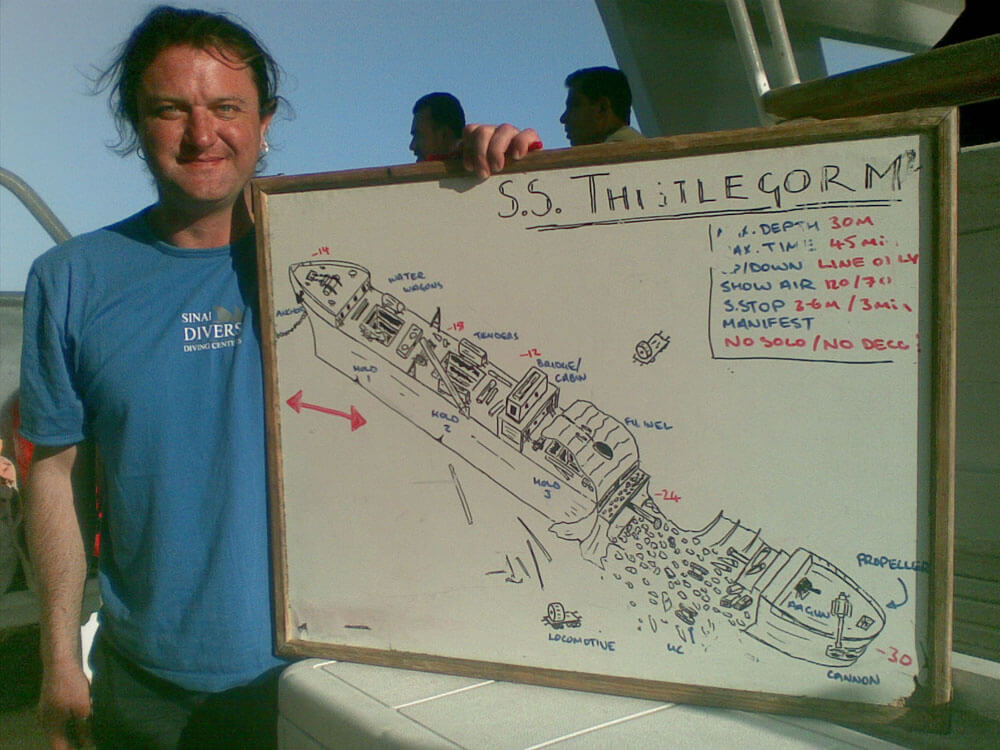
Thistlegorm Dive Briefing
‘It was October 1941, and at that time, the British 8th Army was on the back foot in North Africa; engaged in a bloody struggle against the might of General Erwin Rommel’s Panzer tank division and the Afrika Korps. The British military had devised a plan – known as Operation Crusader – to break the siege and push Rommel back, but to do so, it was in urgent need of resupply. This was over a year before Field Marshall Montgomery would eventually defeat Rommel at the famous battle of El Alamein.
The SS Thistlegorm was part of a convoy dispatched to aid the resupply and, by herself, was a fairly unremarkable ship. Built by Joseph L Thompson and Sons in Sunderland, England, she was commissioned for the merchant Albyn Line in April 1940. Her name ‘Thistlegorm’ is an amalgamation of Thistle – the national flower of Scotland, and gorm, an ancient Gaelic word for the colour blue – so ‘Blue Thistle’.
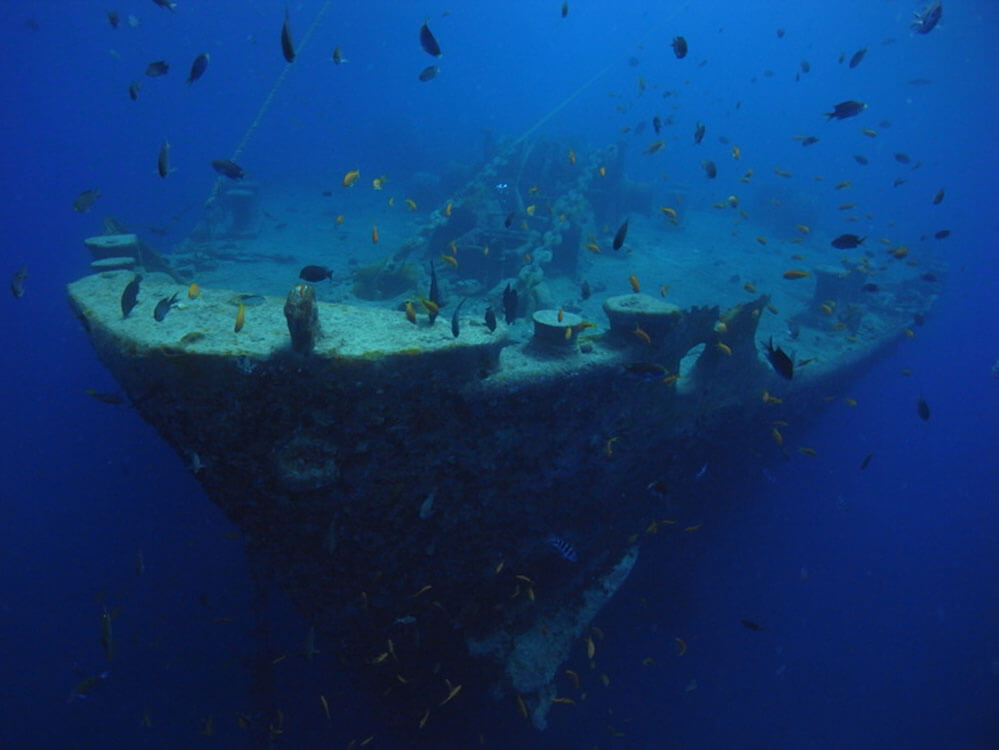
Her designation ‘SS’, or ‘Steam Ship’, reflects the fact that she was a civilian vessel, rather than ‘HMS’ (His or Her Majesty’s Ship), a designation reserved for military craft. Classed as a freighter, she was approximately 128m in length, with a beam (width) of 18m.
Since she hadn’t originally been designed for combat, Thistlegorm was outfitted with concrete panels and steel plating, with an anti-aircraft gun and a 4-inch cannon bolted onto her stern. The cannon, now pointing forlornly at the sea bed and occasional home to a moray eel, was a relic from the First World War; according to one anecdotal report, it was was fired only once during a test on a voyage to the Caribbean, whereupon it was declared that it was probably safer to stand in front of the barrel rather than sit in the gunner’s seat!
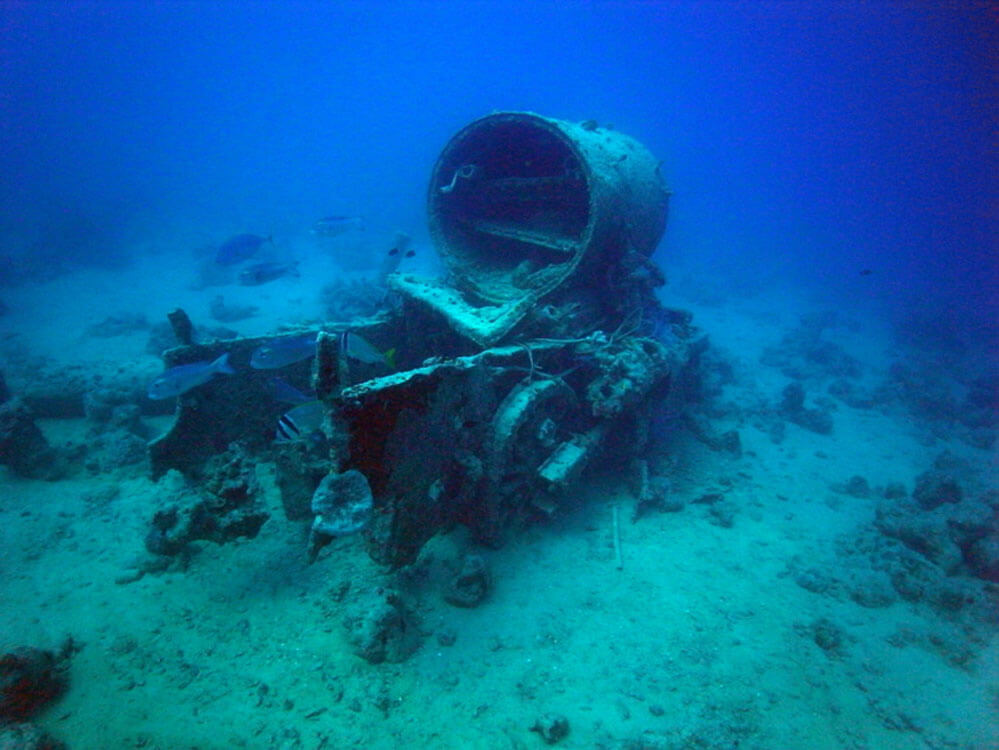
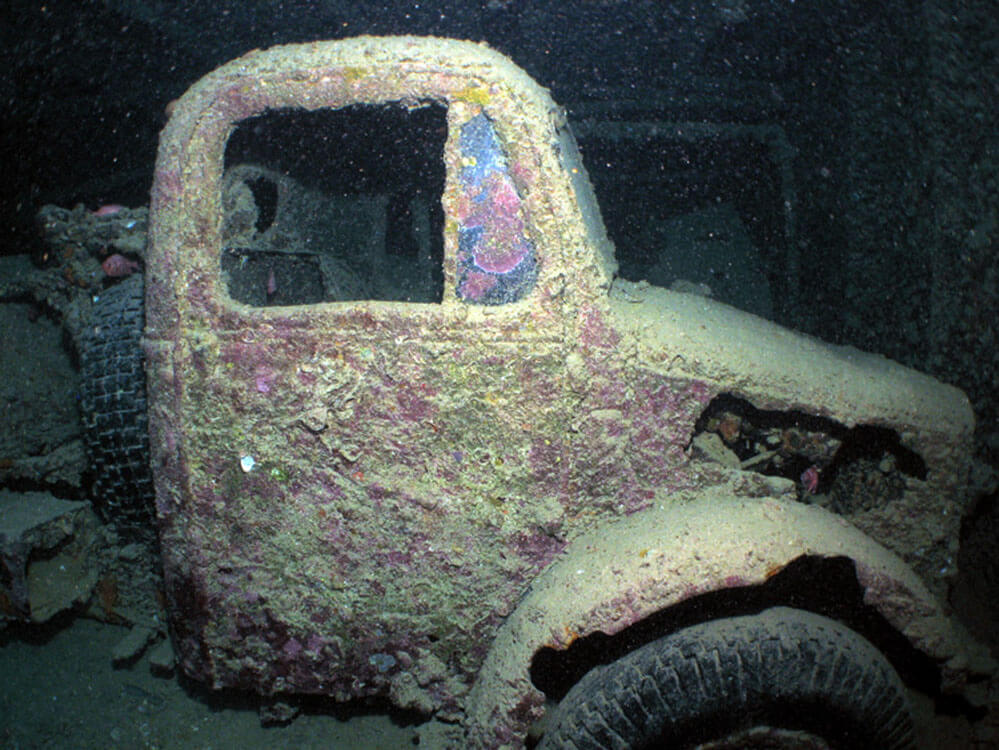
Under the command of Captain William Ellis and with a crew of 39 men – nine of which were Royal Navy gunners – Thistlegorm set sail on the 2 June 1941 from Glasgow, Scotland, laden with supplies for the army. On board were two Stanier class steam locomotives, complete with coal tenders and water wagons; trucks manufactured by Ford and Bedford and the old British manufacturer Tilling Stevens; motorcycles from BSA, Matchless and Norton; and small ‘tanks’ known as the UC – Universal Carrier – MKII.
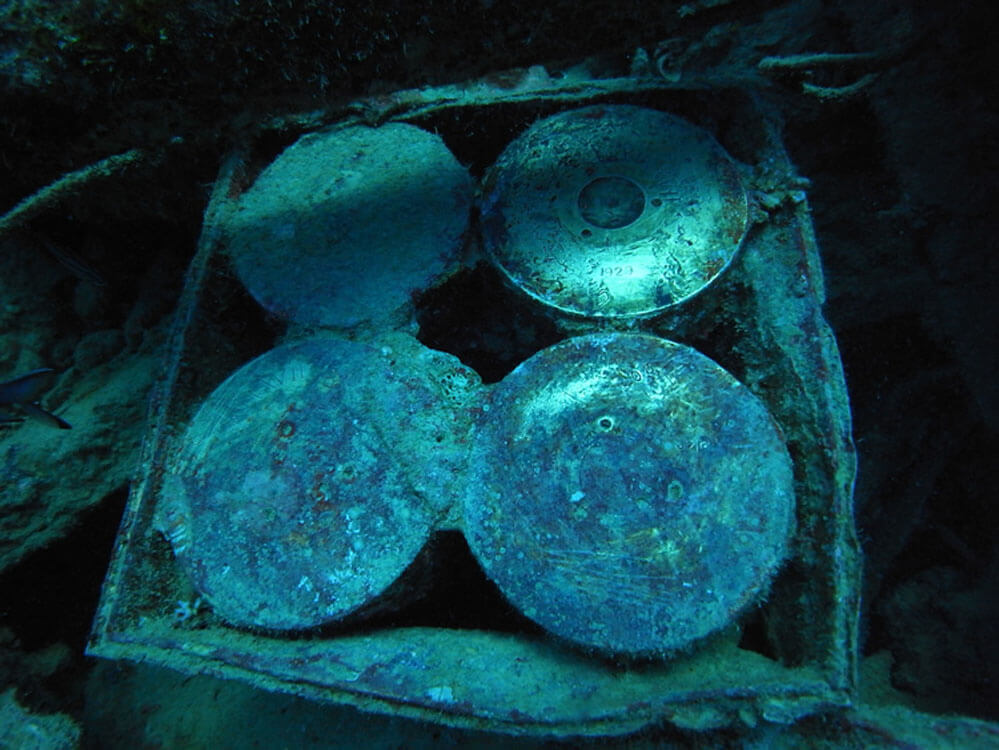
Along with the vehicles she was carrying generators, aeroplane wings and an assortment of odds and ends for which nobody really knows their purpose, and of course, the famous Wellington boots! Needless to say, she was also carrying a vast supply of arms and ammunition.
Hundreds of crates of Enfield .303 carbines, the standard issue of the British 8th Army, were packed into the forward hold, and towards the stern, ammunition of all sizes ranging from bullets for small arms to the massive shells for the batteries of 14-inch shore guns. Just as a word of warning, she was also carrying underwater mines, so be careful not to touch anything!
The shortest route to their destination would have been to sail through the Straits of Gibraltar and into the Mediterranean, however Axis forces – the German and Italian Navies – controlled much of the Mediterranean at this time, and a vast amount of tonnage had already been lost to German U-boats in the attempt to reach the remaining British stronghold of Malta. The safest way, although by no means free of danger, was to circumnavigate Africa, then head into the Red Sea and the Gulf of Suez.
After four months at sea, the SS Thistlegorm, part of a convoy of 16 ships accompanied by the Royal Navy Cruiser HMS Carlisle, was ordered to lay at anchor at Sha’ab Ali in the Straits of Gubal, not far from the Sinai coastline – a location designated as ‘Safe Anchorage F’ – while the wreckage of a tanker was cleared from the entrance to the Suez Canal. At the same time, German military intelligence had received information that the RMS Queen Mary, a cruise liner converted into a troop ship, was passing through the area.
Two German Heinkel HE-111 bombers, probably the most technologically advanced aircraft of the area and equipped with 2.5-ton high explosive bombs, were dispatched from their base in Crete with orders to search for, and destroy, the Queen Mary. This would have been a significant coup for the German propaganda machine – to sink not only a troop carrier but also the British Royal Flagship. Fortunately – especially for the 1,500 Australian troops she was carrying – the German information was a few hours out and the Queen Mary slipped by unnoticed.
Running low on fuel and ordered to return to Crete, the two bombers were following the Sinai coastline when they stumbled upon the Thistlegorm’s convoy by accident. Attacking without warning, they targeted the Thistlegorm as one of the largest ships in the convoy and dropped their payloads. It was late at night on 5 October, 1941. The crew were already bunked down for the evening and completely unprepared for a surprise attack in a location they had thought to be safe.
The Heinkels flew in so low that eyewitness reports suggest that if their undercarriage had been deployed it would have hit the Thistlegorm’s superstructure. The guns were probably never even manned, much less fired, and the Carlisle helpless to respond. At such a low angle, she could not open fire for fear of hitting other ships in the convoy or her own superstructure; the big guns useless against aircraft.
We know that at least one of the bombs hit the ship and in a split second, the Thistlegorm was stricken. Striking just aft of the bridge, the bomb hit the engine room and, as fire spread rapidly thoughout the hold, the ship was torn apart as the ammunition store exploded. The force of the explosion was so powerful that the two steam locomotives, weighing more than 70 metric tons each and chained to the deck, were flung through the air where they came to rest some 30m from the hull.
Imagine that for a moment: Seventy metric tons thrown 30m though the air. Seventy tons. Thirty metres.
Half of the superstructure was removed and the steel plating torn open like a tin can. At approximately 1.39am on 6 October, 1941, the SS Thistlegorm sank with the loss of nine souls.
And this is very important to remember: this is a war grave, and divers should respect it as such. Over the years the wreck has been plundered by souvenir hunters and there’s a way to describe people who steal things from graves. British, German, Italian – we’re all friends now, let’s preserve this ship as best we can for future generations of divers.
In the aftermath, the surviving members of Thistlegorm’s crew were rescued by HMS Carlisle, who then apparently deposited the civilian crew on the Sinai coast, where they were smuggled back to Cairo by Bedouin. The two German bombers were shot down later the same night; their crews captured and shipped to Australia as prisoners of war.
The wreck of the SS Thistlegorm was ‘discovered’ by Jacques-Yves Cousteau in 1956 – although by ‘discovered’, we mean that he asked some local fishermen where they thought this wreck might be, who then pointed to the small flotilla of fishing boats tied to the Thistlegorm’s mast, still standing proud of the water, and said ‘probably over there.’ He recovered the bell and brought a few other things to the surface and then promptly chopped down the mast so that nobody could find it, and then proceeded not to tell anybody where it was!
It was ‘re-discovered’ several times, mostly by British divers, German divers, Russian divers, Israeli divers and so on, depending on which book you want to read, but the truth is that it was never really ‘lost’ as such. Since then it’s become one of the most popular wrecks in the world and it’s important we don’t lose it. This is more than just a dive. This is a history lesson you won’t find in a museum on land. This is an up-close and personal testament to the horrors of war.
Ladies and gentlemen, damen und herren, welcome to the Thistlegorm.’
Mark ‘Crowley’ Russell, Thistlegorm dive briefing, 2012