Truk Lagoon was the site of one of the most brutal naval battles of the Second World War. Today, the so-called ghost fleet of Truk Lagoon is widely considered the pinnacle of wreck-diving; a must-visit destination for both recreational and technical wreck aficionados. Words and photographs by Steve Jones
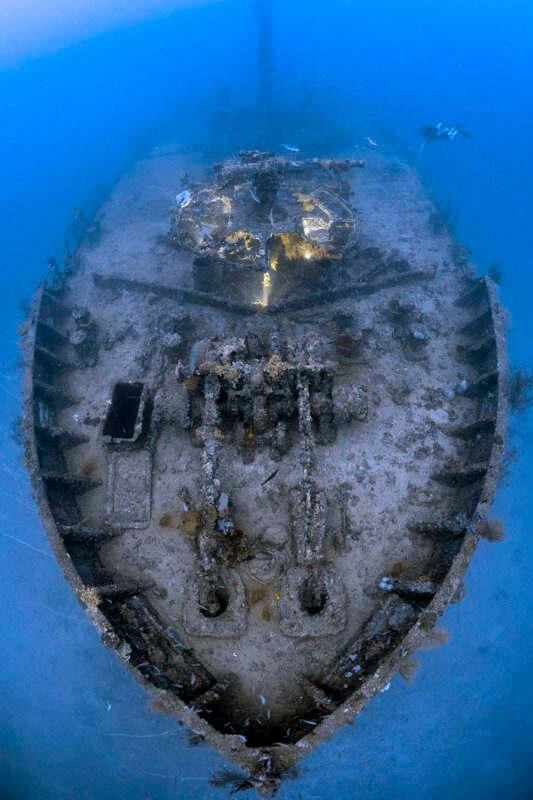
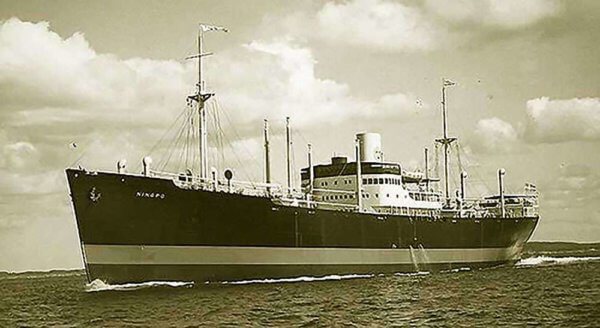
Nippo maru
Avenger bombers from USS Essex sealed the fate of the Nippo Maru, planting three bombs into this cargo ship during the devastation of Operation Hailstone in 1944.
Due to its fascinating and varied cargo, this picturesque wreck has since become a firm favourite with divers visiting Truk. Lying upright, with a list to port at 48m to the sand, dive time will be constrained, so it’s essential to do some pre-planning to take in the many highlights.


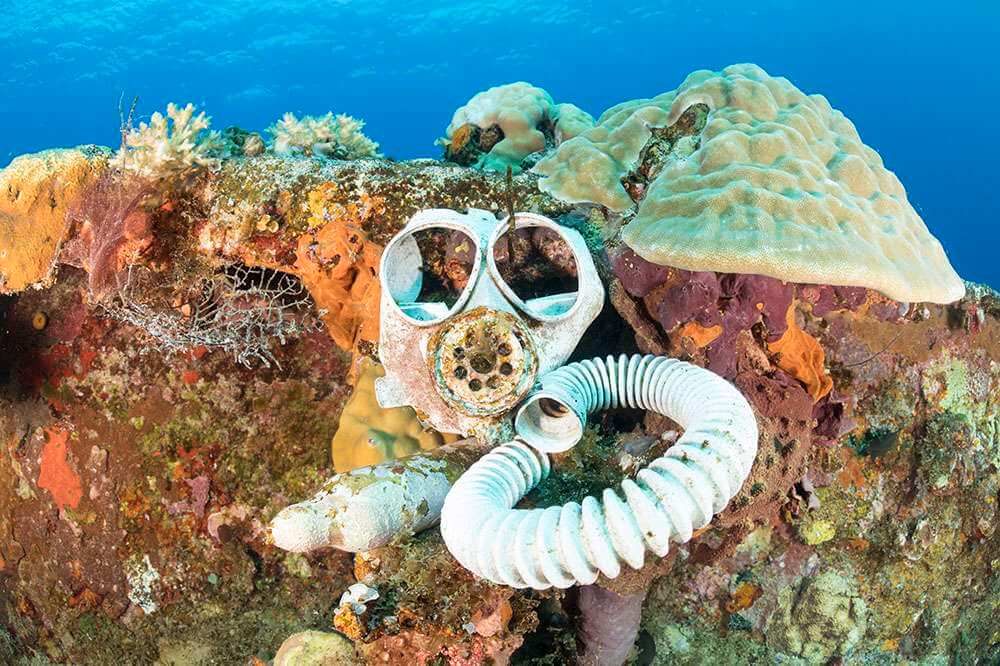
A common route is to start at the forward holds, which are filled with artefacts, including bronze gun rangefinders, gas masks, teapots, bottles and a multitude of ammunition. Just off to the side, the remains of a truck and an intact, solitary battle tank stand on the port deck, overshadowed by the imposing bridge. This is the deepest point of the route, and you then head aft around the superstructure to the slightly shallower starboard rear deck, where you will find three howitzer field guns.
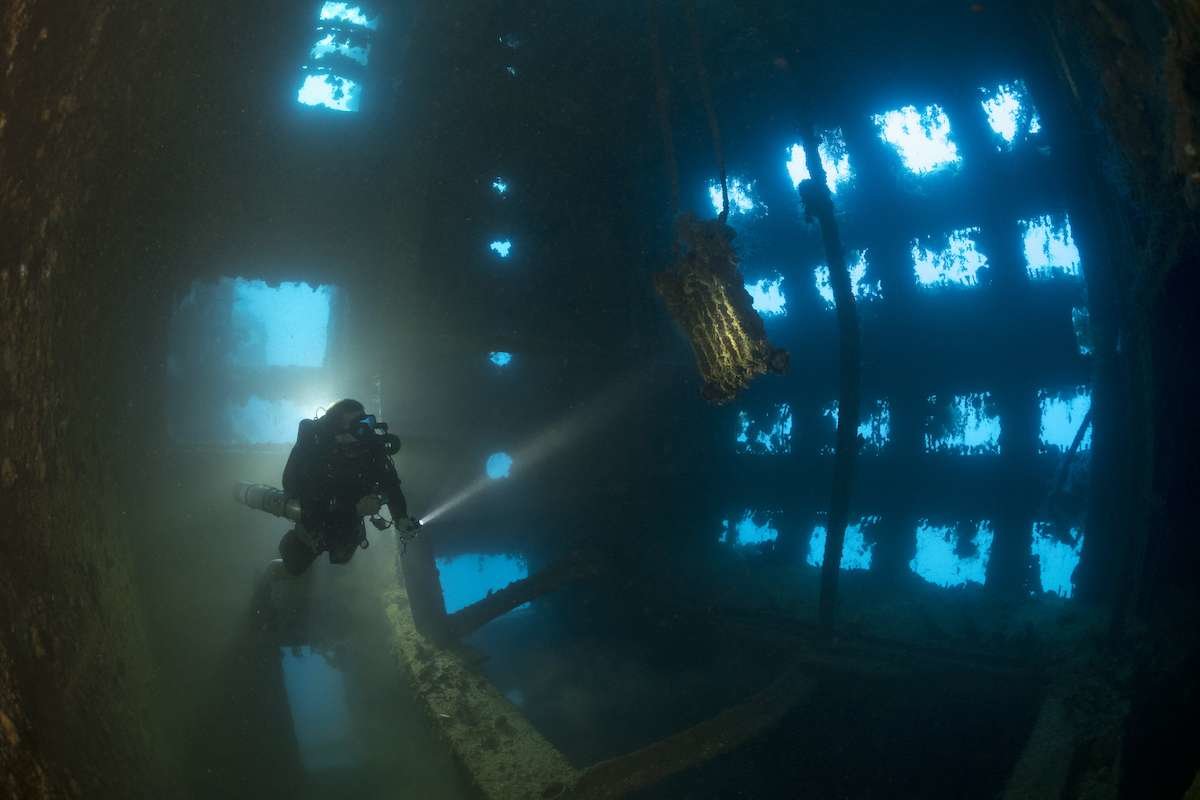
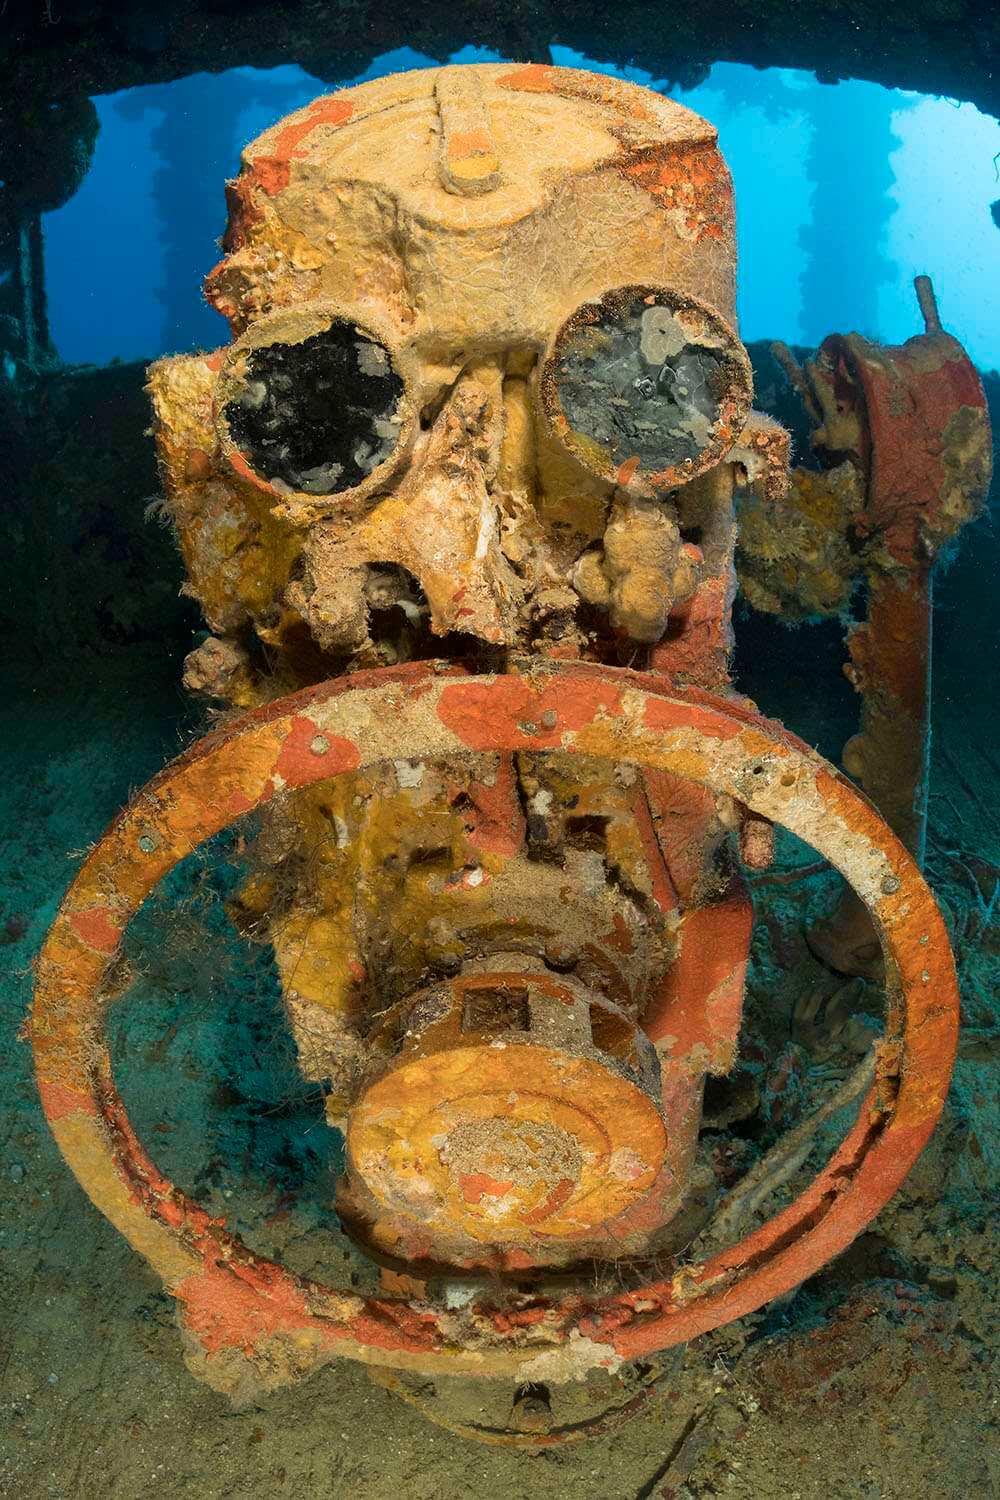
If time allows, you could explore the rear holds, brim with cargo such as gun parts, medical kits and radios. The ascent involves a visit to the must-see bridge, where the steering helm still stands upright. Here, you can peer out for a spectacular view over the forward deck, from where it is not difficult to imagine the fear that the crew must have felt as the swarming US aircraft attacked.
shinkoku maru

It may not be the most famous wreck in Truk; however, among aficionados, the Shinkoku Maru frequently makes the final cut of favourites.
This enormous oil tanker sank upright after being bombed and torpedoed, and at only 15m to the bridge, it has a dive for everyone. For the adventurous, you can drop to the seabed at around 38m and enter the aft hull through a gaping torpedo blast hole, making your way to the cramped and silty lower engine room. Be aware, there are human remains here.
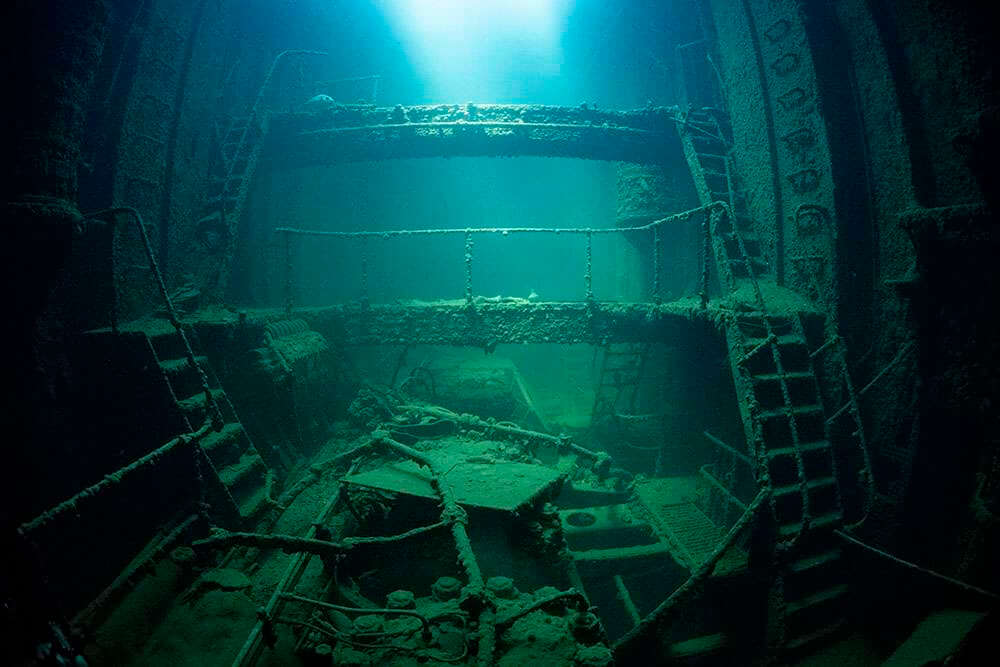
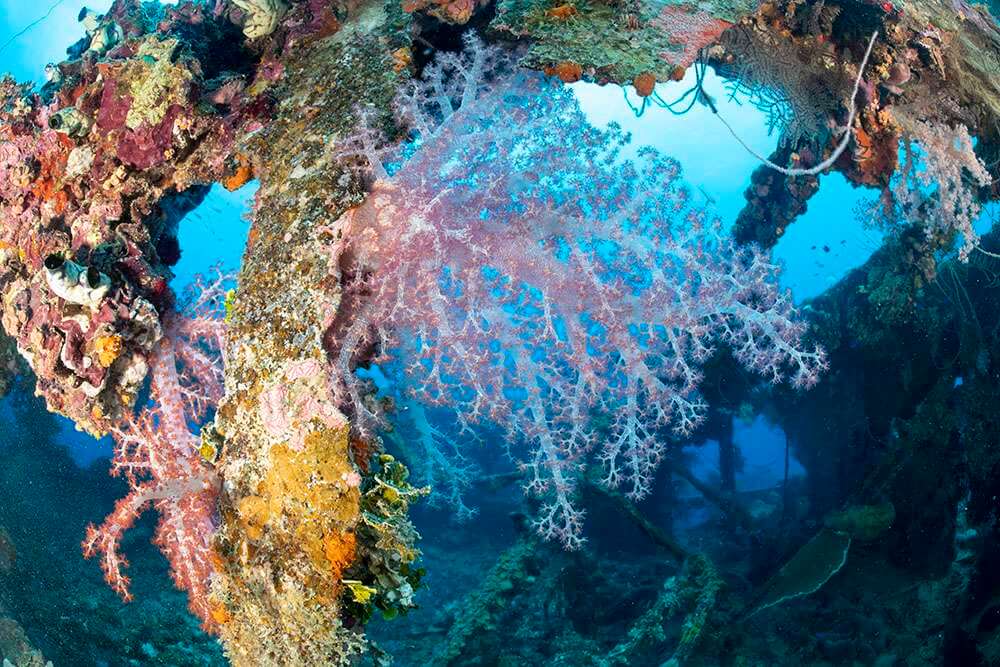
With meticulous planning or the help of a guide, you can then make an exhilarating journey through the innards of the ship to the cavernous upper engine room, which is bathed in a surreal emerald light. The sun-washed deck is a complete contrast, as it’s a kaleidoscope of colour, covered in healthy hard and soft corals and teeming with reef fish down the entire length.
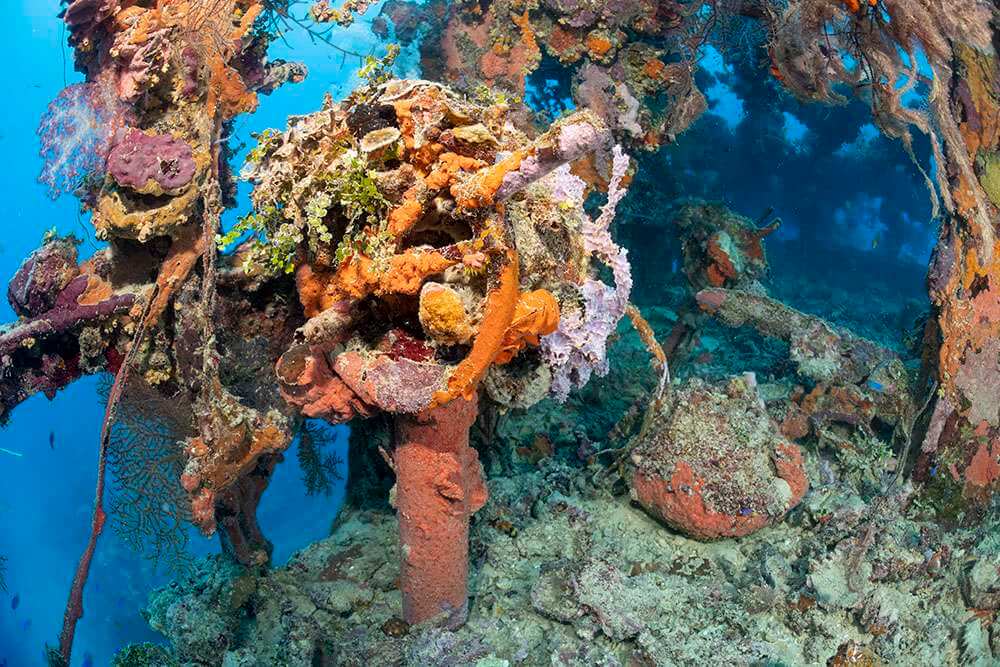
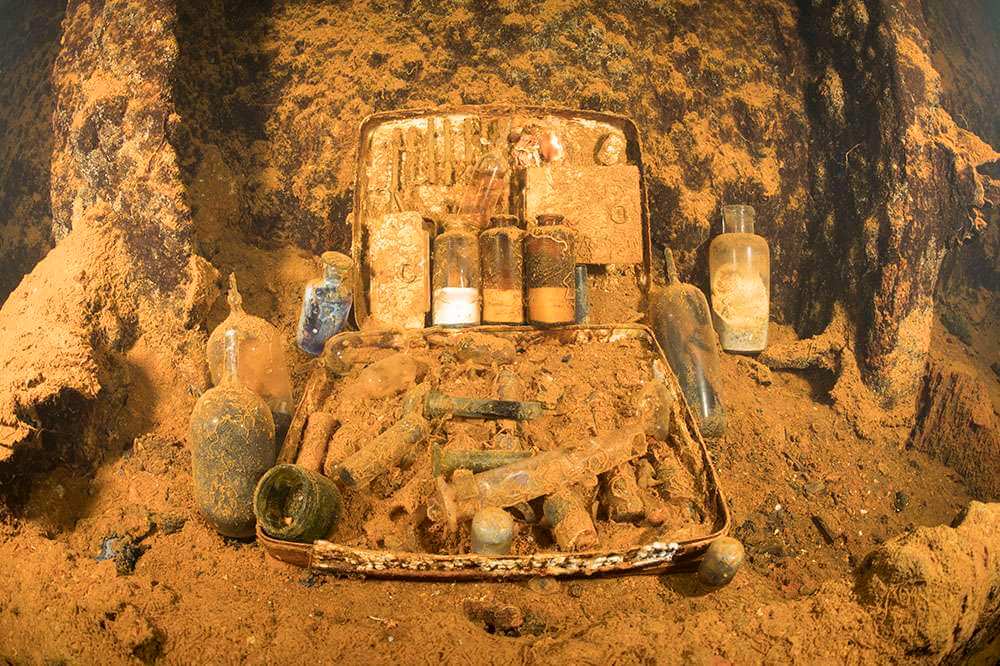
A fair swim to the forward superstructure will bring you to the ship’s infirmary, complete with washrooms with a tiled bath and latrine; nearby, an operating table can often be seen stacked with medicine bottles placed on top by divers. Above are the officers’ quarters, which sit under the prettiest bridge you are ever likely to see, adorned with pink, white and orange soft corals that surround not one but three intact telegraphs.
This magnificent wreck is much too big to see in one dive, and you will want to spend hours and hours exploring it.
fujikawa maru

Over the years, the Fujikawa Maru has often been cited as one of the best wreck dives in the world. The passage of time has taken its toll and it is no longer in its prime, yet it remains such a great dive that we can only wonder just how good it must have been in the 70s and 80s.
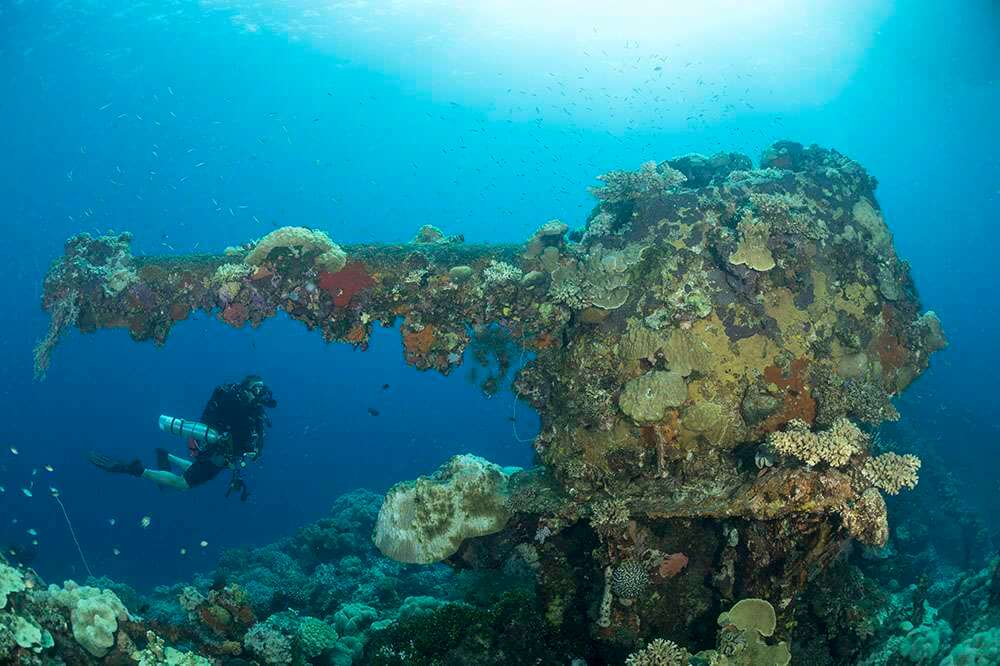
Originally built as a passenger-cargo ship in 1938, she saw a fair share of action before being sunk, now lying upright at 35m. One of the standout features is the huge coral-encrusted gun at the bow, whose brass maker’s plate indicates it was made in Britain in 1899, supplied at a time when the UK and Japan were allies.


The storage areas are brimming with cargo, such as the propeller blades, aircraft engines and torpedoes to be found in Hold 1. Proceeding into Hold 2, the bounty increases even more, as there are not only wings but entire fuselages of Mitsubishi Zero fighter planes here. Exploring deeper you will find a tool-filled workshop.
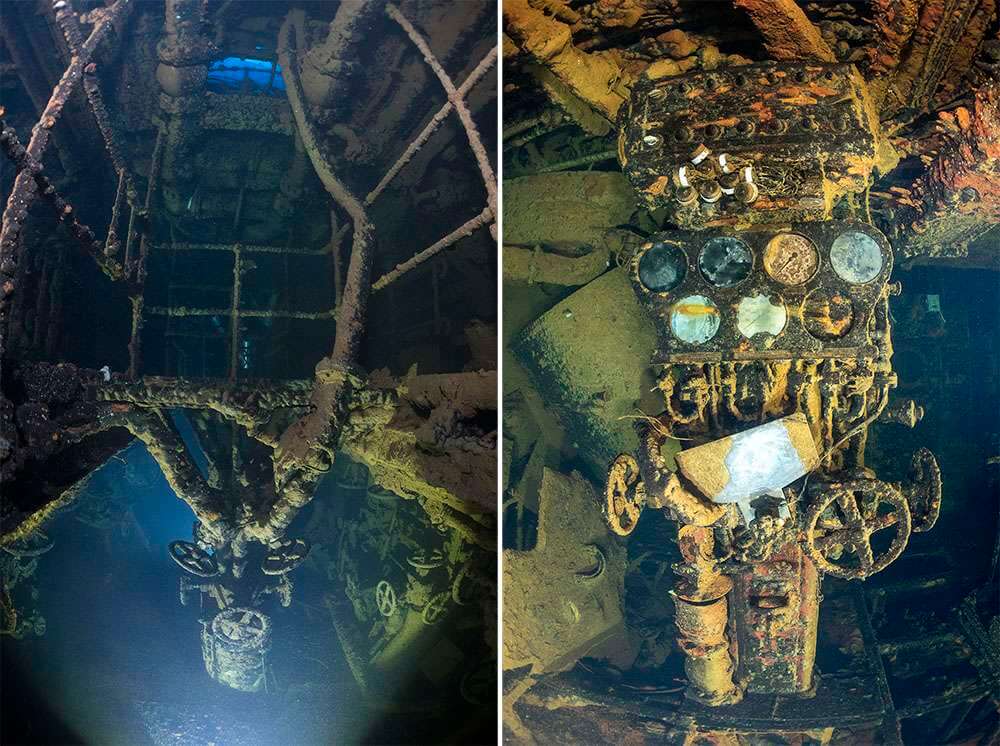
The central superstructure and bridge areas have suffered over the years. They were once described as largely intact by divers who visited decades ago. Today they are collapsing inwards, with items such as the bridge controls having long since disappeared.
The Fujikawa Maru’s story is an example of why the wrecks of Truk Lagoon should be seen sooner rather than later. It is still an awe-inspiring wreck, but for how much longer?

HEIan maru

The mighty Heian Maru was once a luxury passenger and cargo ship. She was sunk after multiple torpedo and bomb hits which claimed the lives of 18 men.
This is the largest wreck in the atoll, lying on its side at a depth of 10m. A good place to start is at the bow, where you’ll find the ship’s name clearly visible in huge letters. Dropping over the side here will bring you to the forward holds, where artillery shells and torpedoes can be seen, remnants from her wartime role as a submarine tender.

As you make your way aft, you then come to the main superstructure of the wreck, where even the companionways are worthy of exploration. Here are stored 15m-long submarine periscopes. The interior of the superstructure is cavernous but most of the interesting artefacts have dropped to the bottom.
Further back, Hold 3 contains no cargo but two deck guns lie in the vicinity, possibly having been flung there as the ship was bombed. The rear holds will keep you busy for at least the rest of the dive. Beer bottles, gas masks, oxygen bottles and wooden cases make up the cargo.
The Heian Maru’s sister ship, the Hikawa Maru, was one of only two Japanese large passenger ships to survive the war. It is now a museum ship, permanently moored in Yokohama.
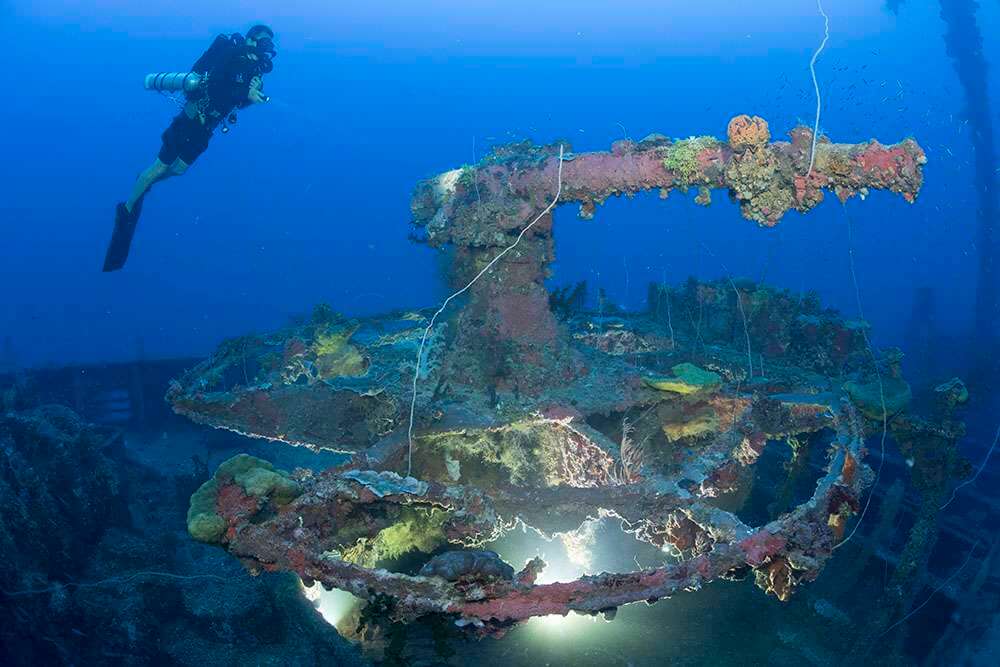
san francisco maru
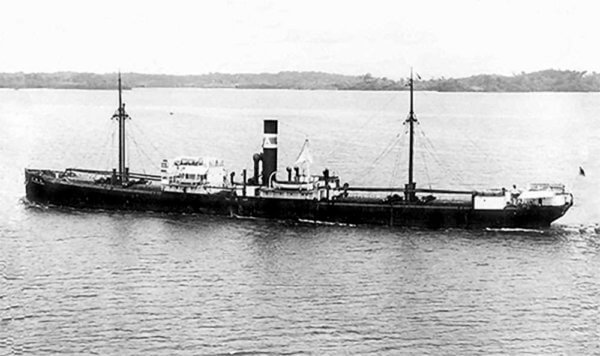
This is the wreck that sits at the top of many technical divers’ must-do lists, and with good reason. Built as a cargo and passenger ship in 1919, this substantial 117m- long vessel took no fewer than six hits from dive bombers before she sank.
The wreck lies in crystal clear water at 65m to the seafloor. However, you can keep your depth to around 50m if you stick to exploring the deck. The holds will of course take you deeper, and are full of items of interest such as the mines, shells and bombs you’ll find in Hold 1. These were originally intended to repulse the land invasion of Truk that never came, and many were recovered by the Chuukese, risking their lives for explosives to carry out the destructive practice of dynamite fishing.
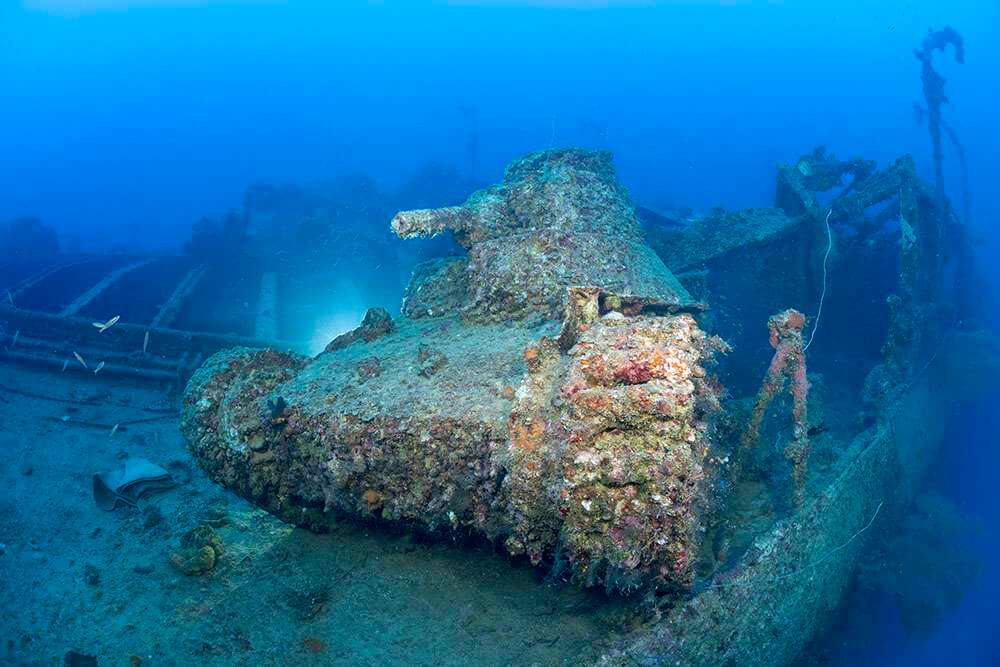

Hold 2 has even more ammo, trucks and aircraft parts, along with crates of machinery and crockery. On the deck are two Ha-Go light tanks, one atop the other, and the remains of a flatbed truck, with a third tank standing on the port side.
You will then reach the superstructure which is open for exploration and also brimming with artefacts. Beyond this area can be found Holds 3 and 4, which are packed with boxes of grenades, torpedoes and yet more trucks!
The amount to see far outweighs the time you will have on any single dive and you’ll quickly realise why this is known as the ‘million-dollar wreck’.